Most of you who read this must be Bloggers or Website owners and would be really careful in terms of website security, so am I. However, hackers don’t really send you warning before hacking your website. I did publish a post few days back informing you how to prevent malicious URL requests to your site. That would prevent injection of malicious codes to your site. Also, you can change the prefix of your database tables to prevent MySQL injection attacks (it is “wp_” by default for WordPress Blogs). This is just a part of precaution methods, but there could be several other methods that can be used to hack a website.
Not long back did we see that Digital Inspiration, one of my favorite Technology Blog was hacked and in a tweet, Amit Agarwal mentioned about it. He also wrote
On July 1st, the hacker stepped on the gas and deleted every single file /website that was hosted on my web server.
Well, he perhaps had the backup of file and restored them as soon as possible. This shows how important it is to backup files on your web server. If you are on HostGator, you need not worry much about backups as they are automatic. However, not all web hosts offer that and you need to do it manually. Downloading backups everyday would be a tough job and if you backup all files to your own server, it would make no sense as they might get deleted once your site is hacked.
In such cases, you may wish to backup all your files to Cloud, the best solution could be Dropbox. Int this post, I would like to tell you about a web service which automatically backs up files on your server to Dropbox. You can use Backup Box for this purpose.
Get a Dropbox account from here and get a Backup Box account from here.
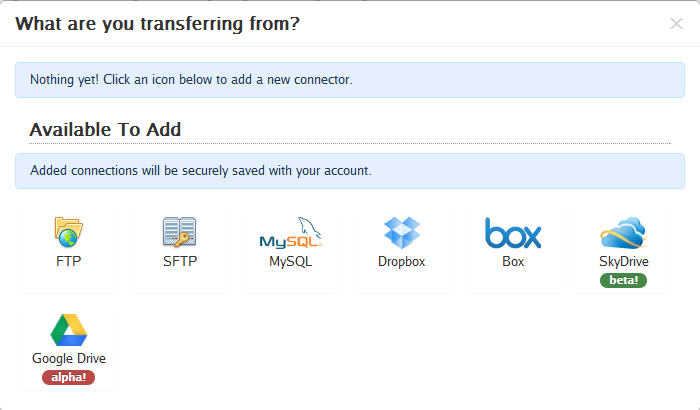
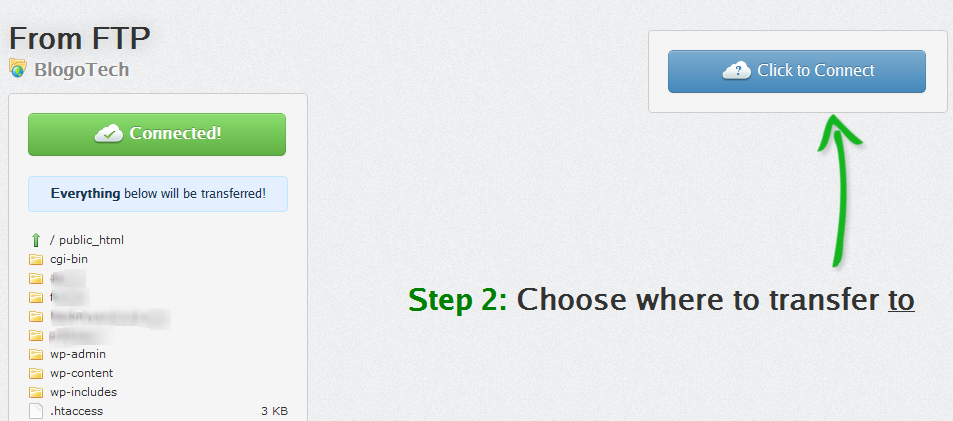
Once you have that done, you can head over to Backup Box and click on “Click on Connect”button. Aftert this, you need to select the location from where you would like the file to be backed up. In this case, you must select “FTP”. If you wish to backup your database, you need to select “MySQL’.
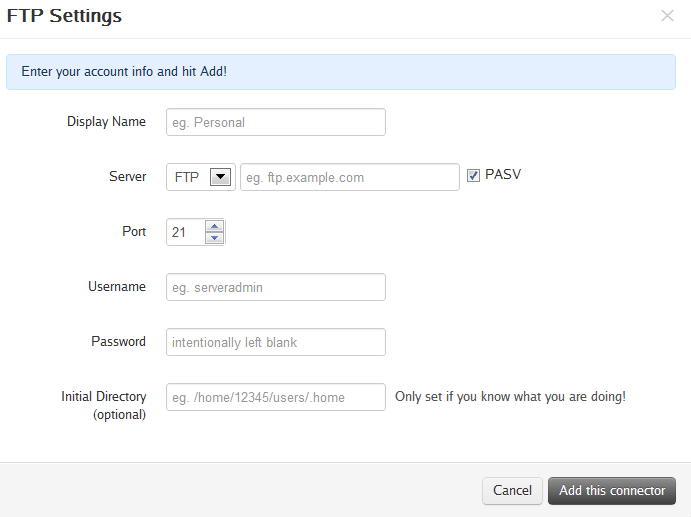
Once that is done, you now need to enter the FTP details that you use to connect to your server. The port is usually 21, but if that does not work, you can use “20”. You will find these details on your cPanel.
Click on “Add this connector” and proceed to the next step where you need to select the folder on your server that you wish to be backed up. If you wish the whole site to be backed up along with any add-on domains (if present), you must select the public_html directory.
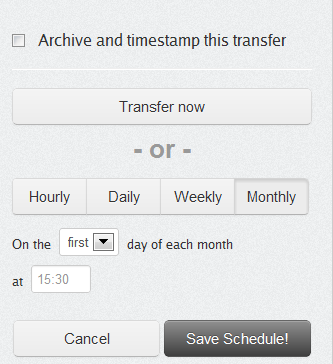
Once this is done, connect your Dropbox account with Backup Box and then you can schedule the backup by specifying the details as shown in the image below:
Doing this will automatically backup files on your server to your Dropbox account. If you have automated Database backup using a WordPress plugin, the backed up Database file will also be synced with your Dropbox account.
This ensures that even if your site is hacked, you can restore is without any hassle, If you have any alternatives to do this, please let me know in the comments section 🙂
